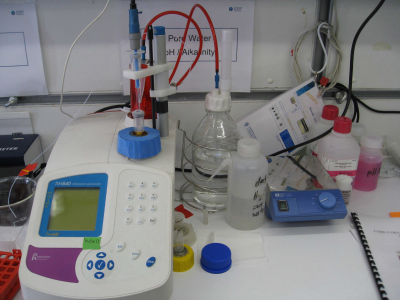
Alkalinity / pH
pH value
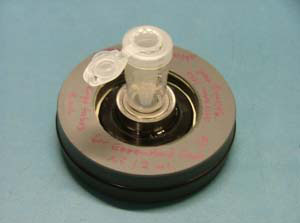
The solutions have to be stirred with a magnetic stirrer during all measurements. Use an appropriate beaker and a PTFE coated mini stir bar. In order to allow measurement with very small sample quantities use a flat membrane pH electrode and an extra thin stir bar. Alternatively use magnetically driven sample cup holder, which turns the sample cup around the electrode, such that the sample is stirred without a stir bar simply by friction between the sample cup wall and the electrode.
Calibrate WTW pH meter using seawater background pH buffers. The pH meter may be calibrated either automatically using standard buffers (4,7,10) or manually with user definable pH buffer solutions (see instrument manual). The sample or buffer temperature has to be set prior at each measurement. Use an electrode with integrated t-sensor. If space is limited measure the temperature separately and manually set the instrument to that temperature. Make sure that for each measurement both the pH-sensitive glass electrode tip and the electrode diaphragm (i.e. ceramic stick at the side, ring around flat tip electrode) that connects the solution to the inner reference system of the electrode are immersed in the solution.
pH-controlled alkalinity titration
Calibrate a second pH meter or the Radiometer autotitrator control unit (PHM 290) with standard buffer solutions 7 and 4. If you do not use the autotitrator the PHM 290 may be used as an excellent standalone pH meter. Since this is a pH measurement, the same rules for stirring and temperature control as above apply.
Place a microelectrode in a known amount of sample (1mL of sample in a 2 mL Eppendorf cup). The sample cup has to be large enough to hold sample and titration solution. Fill the burette with attached microtube with 0.01 molar hydrocloric acid. Make sure the system is bubble free to the tip of the microtube. Use the smallest microtube possible and the slowest dispensing speed. Attach the PTFE microtube to the electrode such that the tube end is immersed in the sample together with the electrode
Note the start pH and perform a pH controlled titration to a pH of approximately 3.8 (Set the autotitrator to an endpoint of pH 3.8). Stir well.
Note the concentration and the exact amount of acid and the exact final pH value.
The autotitrator will overtitrate but returns as a result the amount of HCl needed to reach the setpoint
The alkalinity is calculated from:
Alkalinity (mol/l) = (H+added - H+excess + H+initial) / v0
Alkalinity (mol/l) = [(vHCL ∗ cHCL) - 10-pHfinal ∗ (v0 + vHCL)/fH+ + 10-pHstart ∗ v0/fH+] / v0
vHCL - volume of HCL added to final pH in mL
cHCL - molar concentration of HCL added (usually 0.01 molar)
pHstart - initial pH - may be negligible if well above 7
pHfinal - final pH - measure as precise as possible, should be between 3.9 and 3.5
v0 - initial sample volume in mL
fH - activity coefficient of H+ in seawater ... use 0.79
The above equation accounts for the dilution by the amount of HCl added and is fairly stable to different volume / pH data couples or to measurements with different HCl concentrations.
We usually prefer manual titration using the Accustep digital burette or – if the approximate amount of HCl needed is known from adjacent samples – even by titration with adjustable Eppendorf pipettes. Using the equation above often one or a few additions of acid are sufficient. This saves space on the table and is usually faster since the autotitrator has to be set to slow speed to give exact results. Both the Radiometer Autotitrator and the Accustep digital burette are theoretically capable of dispensing single µL amounts of acid. If the microtube is not immersed in the sample the accuracy goes down, because a single drop of acid is approximately 30 µL.
Accustep digital burette
There are two syringe types: Type B (25 mL) and type (C 5 mL). The syringes have a luer slip tip so that you can connect all kinds of disposable luer ware
Assembly:
Do not turn on the control unit before a syringe is attached to the handset. If you do so and play with the buttons the plunger drive might move too far up or down and you will have to disassemble the handset to manually put it in a proper position.
Grip the syringe plunger, pull it out a bit (might be a bit tricky when it went in all the way). Slip the upper end of the plunger sideways into the low end of the handset. Screw the body of the syringe onto the headset.
Connect the handset to the control unit. The control unit is connected to mains and switched on by a soft button (low right).
Preparation:
There will be blinking lights reminding you to reset the unit and set the syringe type:
With the syringe attached, the handset is re-zeroed by moving the plunger drive up a bit (<key on the handset) and all the way down (>key).
Set the syringe type to either B or C with the syringe key on the control unit. Like with a normal syringe, you can now fill the syringe and attached tubing and get rid of air bubbles by holding the handset upright and moving the plunger using the < and > keys on the handset. To avoid vacuum fill the syringe first without small diameter tubing. With microtubing use the C syringe and set the slowest speed possible (speed key). When the system is air free you can fill it. The display will show the amount of liquid in the syringe (25 mL or 5 mL ). For best precision move the plunger down 1 cm again (> key) and use preferably the upper half of the syringes.
Modes:
You can use the Accustep in three modes: Dispense, Burette, and Dilute.
Dispense:
a red light will flash until you set an amount in µL (type in a number i.e. 25 and press the set key). Now the unit will dispense 25 µL every time the button on the handset is pressed. The total amount will be recorded on the display.
Burette:
The unit will dispense liquid as long as you press the button on the handset. The total amount is recorded on the display.
You can refill the syringe at any time by using the < key on the handset. The unit will
memorize the dispensed amount.
Caution:
If you switch between the modes the unit will lose the recorded total amount! To change the syringe move the plunger down all the way first. Remember to re zero the new syringe and set then new syringe type (see above).


