- Home
- Christian Hilgenfeldt
- MSCLS
Multi-Sensor-Core-Logging-System
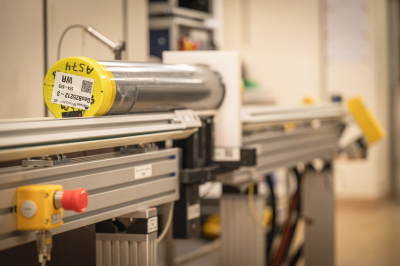
The Multi-Sensor Core Logging System (MSCLS) is a device for the automated and quality-assured acquisition of physical properties of core samples.
Description:
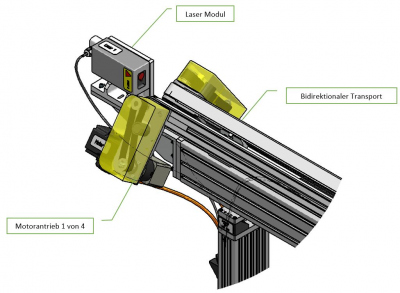
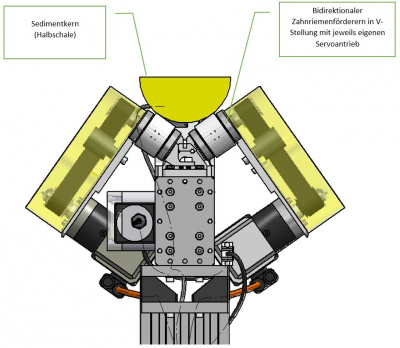
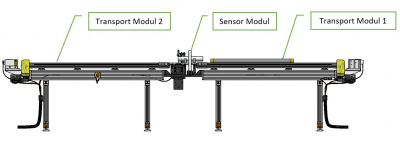
The MSCLS was developed at the Center for Marine Environmental Sciences (MARUM) and is particularly well suited for the measurement and analysis of sediment samples and drilling material, which can be positioned in solid cores, half shells or on individual carrier material. In contrast to all other logger systems available on the market, with the MSCLS the sample material is not moved past a series of sensors one after the other in push mode, but each measurement object is transported individually and completely uniquely in bidirectional direction (single object measurement system). All installed sensors record their data simultaneously and display it in real time. Two laser measurement systems ensure continuous and precise positioning of the core samples and also monitor the smooth motion sequence. Different sensor diameters allow the measurement of drill and sediment cores with a diameter of 50 to 150 mm, which have been cut into sections of up to 1,800 mm in length. Due to the V-shaped and flat drive belts, the sample material centers itself automatically. This eliminates the need for major rebuilding when changing different core diameters, making the system even more efficient. 4 synchronized servo motors can safely and precisely transport sediment cores weighing up to 30 Kg and with a speed of up to 10 cm/s. This makes the system much faster than all other systems of this kind on the market.
Functionality and concept of use:
The MSCLS is optimized for mobile use at sea or for use in the laboratory (no radioactive source, corrosion-free, positionally stable, rigid, adaptable to uneven ground, easy and quick to install and dismantle). With parallel use of gravity-, piston- and vibro corer, no conversion of the transport systems for variable core cross sections is required. LabVIEW control software optimized for the measurement sequences guarantees fast and reliable measurement progress (pre-input of core metadata, easy core handling by forward and backward movement, permanent laser position control, displays for measurement and data status, flexible measurement sequence based on single segments). Data processing generates export formats in ASCII format.
Scientific Benefit:
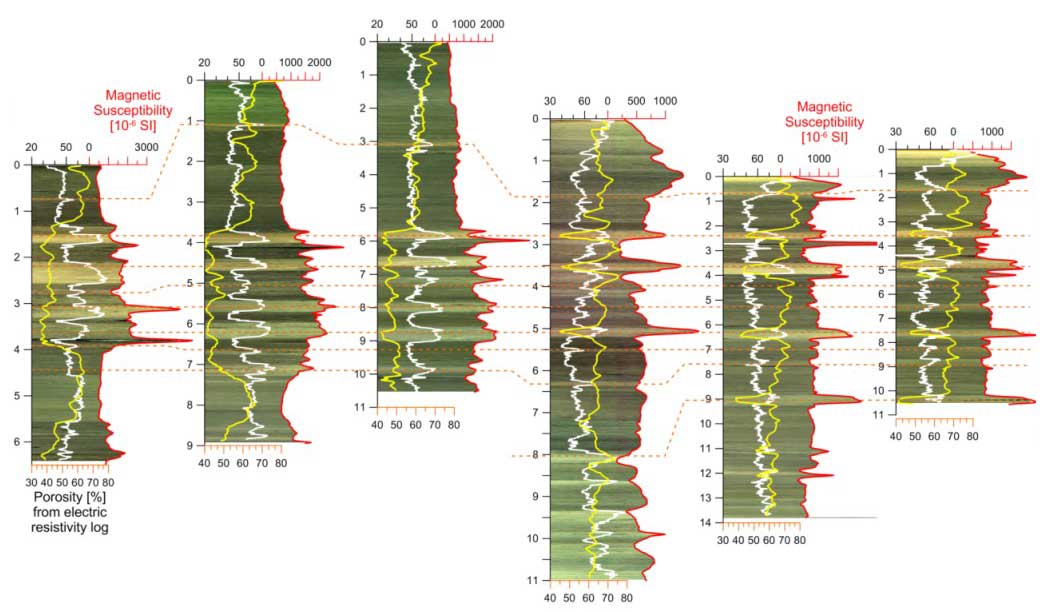
The MSCLS has been used since 2016 on expeditions and during shore work for high-resolution non-destructive measurement of sedimentary physical properties on closed or opened cores. The magnetic susceptibility and electrical conductivity sensors provide meaningful and complementary lithologs for core language and stratigraphy, often ready within hours of core collection. These logging data are of great use to many scientists and users because they allow rapid assessment of the age and quality of the cores obtained. Core logs and scans are fully reproduced and described. They are an authoritative selection criterion for subsequent detailed core studies. Susceptibility logs reproduce climate-induced lithology changes particularly concisely and are therefore used for core retrieval and for cyclostratigraphic correlation of cores. Electrical conductivity provides independent signals that can be used stratigraphically, even for diagenetically altered cores, and provides approximations of porosity (for geochemistry and sedimentology) and density via Archie's formula. Seismologists, among others, use this to determine acoustic impedance for synthetic seismograms. The system ensures uniform calibrations and sophisticated post-processing so that all data are quantitatively comparable with almost no artifacts or data gaps up to near segment boundaries, which is not possible with the standard procedure used by other logger manufacturers.
Summary and comparison to other systems:
| Loggers from other manufacturers | MARUM MSCLS | |
| Basic structure: |
|
|
| Drive concept: |
|
|
| Control: |
|
|
| Processing: |
|
|
Design and equipment (as of 2022):
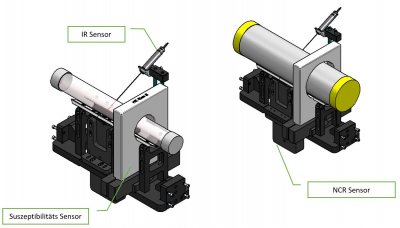
Sensor technology (non-contact and non-destructive):
- Measurement of electrical resistance:
- Sensor: Non-contact resistivity (NCR) V2 - 2015
- Manufacturer: Geotek Limited UK (This sensor was developed in collaboration with the British Geological Survey and the University of Leicester)
- Resolution: 0,1 bis 10 Ohm-Meter
- Control and measurement electronics:
- Manufacturer: National Instruments / MARUM
- Resolution: 16 bit DAQ 250.000 S/s
- Sensor: Non-contact resistivity (NCR) V2 - 2015
- Measurement of magnetic susceptibility:
- Sensors: MS2C Core Logging Sensor
- Manufacturer:Bartington Instruments Ltd.
- Loop internal diameter: 140 mm und 85 mm
- Operating frequency: 0.565 kHz
- Drift at room temperature: <2 x 10⁻⁵ SI (vol) in 10 minutes
- Control unit: MS3 Meter
- Manufacturer: Bartington Instruments Ltd.
- Maximum resolution: 2x10⁻⁶ SI (2 x10⁻⁷ CGS)
- Range: 26 SI (volume specific)
- Measurement time: Selectable to 0.1 s minimum
- Sensors: MS2C Core Logging Sensor
- Measurement of sample temperature:
- Sensor: contactless IR temperature sensor
- Resolution: 16 bit
- Measuring range: -18 – 200°C
- Update rate: 10 S/s
- Housing: Stainless steel IP65 protected
- Sensor: contactless IR temperature sensor
Basic dimensions:
- The footprint of the system is 4.2 meters in length, 0.6 meters in width
Measurement speed:
- The measurement speed at a typical measurement trigger of 1 cm is 15 minutes per core meter
Software:
- Fully automatic acquisition and control of all sensors and drives
- Monitoring of the measuring process
- Output of all acquired measurement and processed measurement values incl. raw data
- Logging of all measuring steps and storage
- 1-click evaluation of acquired measured values
- Configurable thanks to editable initialization file in plain text
- Extensible, thanks to open source LabVIEW software
Extensibility:
- Any actuators and sensors with the following interfaces:
- RS 232/485
- Analog signals up to ± 10 V
- Real-time EtherCat (Ethernet for Control Automation Technology)
- Ethernet
